

When we feel like our brakes aren't working properly, they're squealing, or our wheels are hard to turn, we need to take a closer look. Basic maintenance isn't difficult and anyone should be able to handle it, but if we encounter problems, it's worth visiting a service center. Brakes may be malfunctioning for several reasons:
- Old brake cable
- Worn brake pads
- Centered wheel
- The clamps are simply old (material wear)
- Damaged armor
- Other
Worth checking - Bicycle brakes - an important part of the bike!
Preparation
To find the cause, we need to start by checking our brake cable and housing. To check the cable's operation, we need to unscrew the screw securing the cable to the brake arm. While pressing on the lever and holding the cable, we use our other hand to check if it slides freely and smoothly within the housing. If resistance is felt, the cable needs to be replaced, often along with the housing. We described how to do this in the previous article. If everything is OK, we move on to checking the wheel. Truing is not easy, and we don't recommend it to anyone without the necessary knowledge and experience. While spinning the wheel, we place something plastic against the rim and check if it rotates straight. To avoid damaging the wheel, avoid using sharp or metal elements. If you notice your wheel wobbling in one direction or the other, you need to realign it. If you're familiar with this, take action; if not, take it to a specialist.
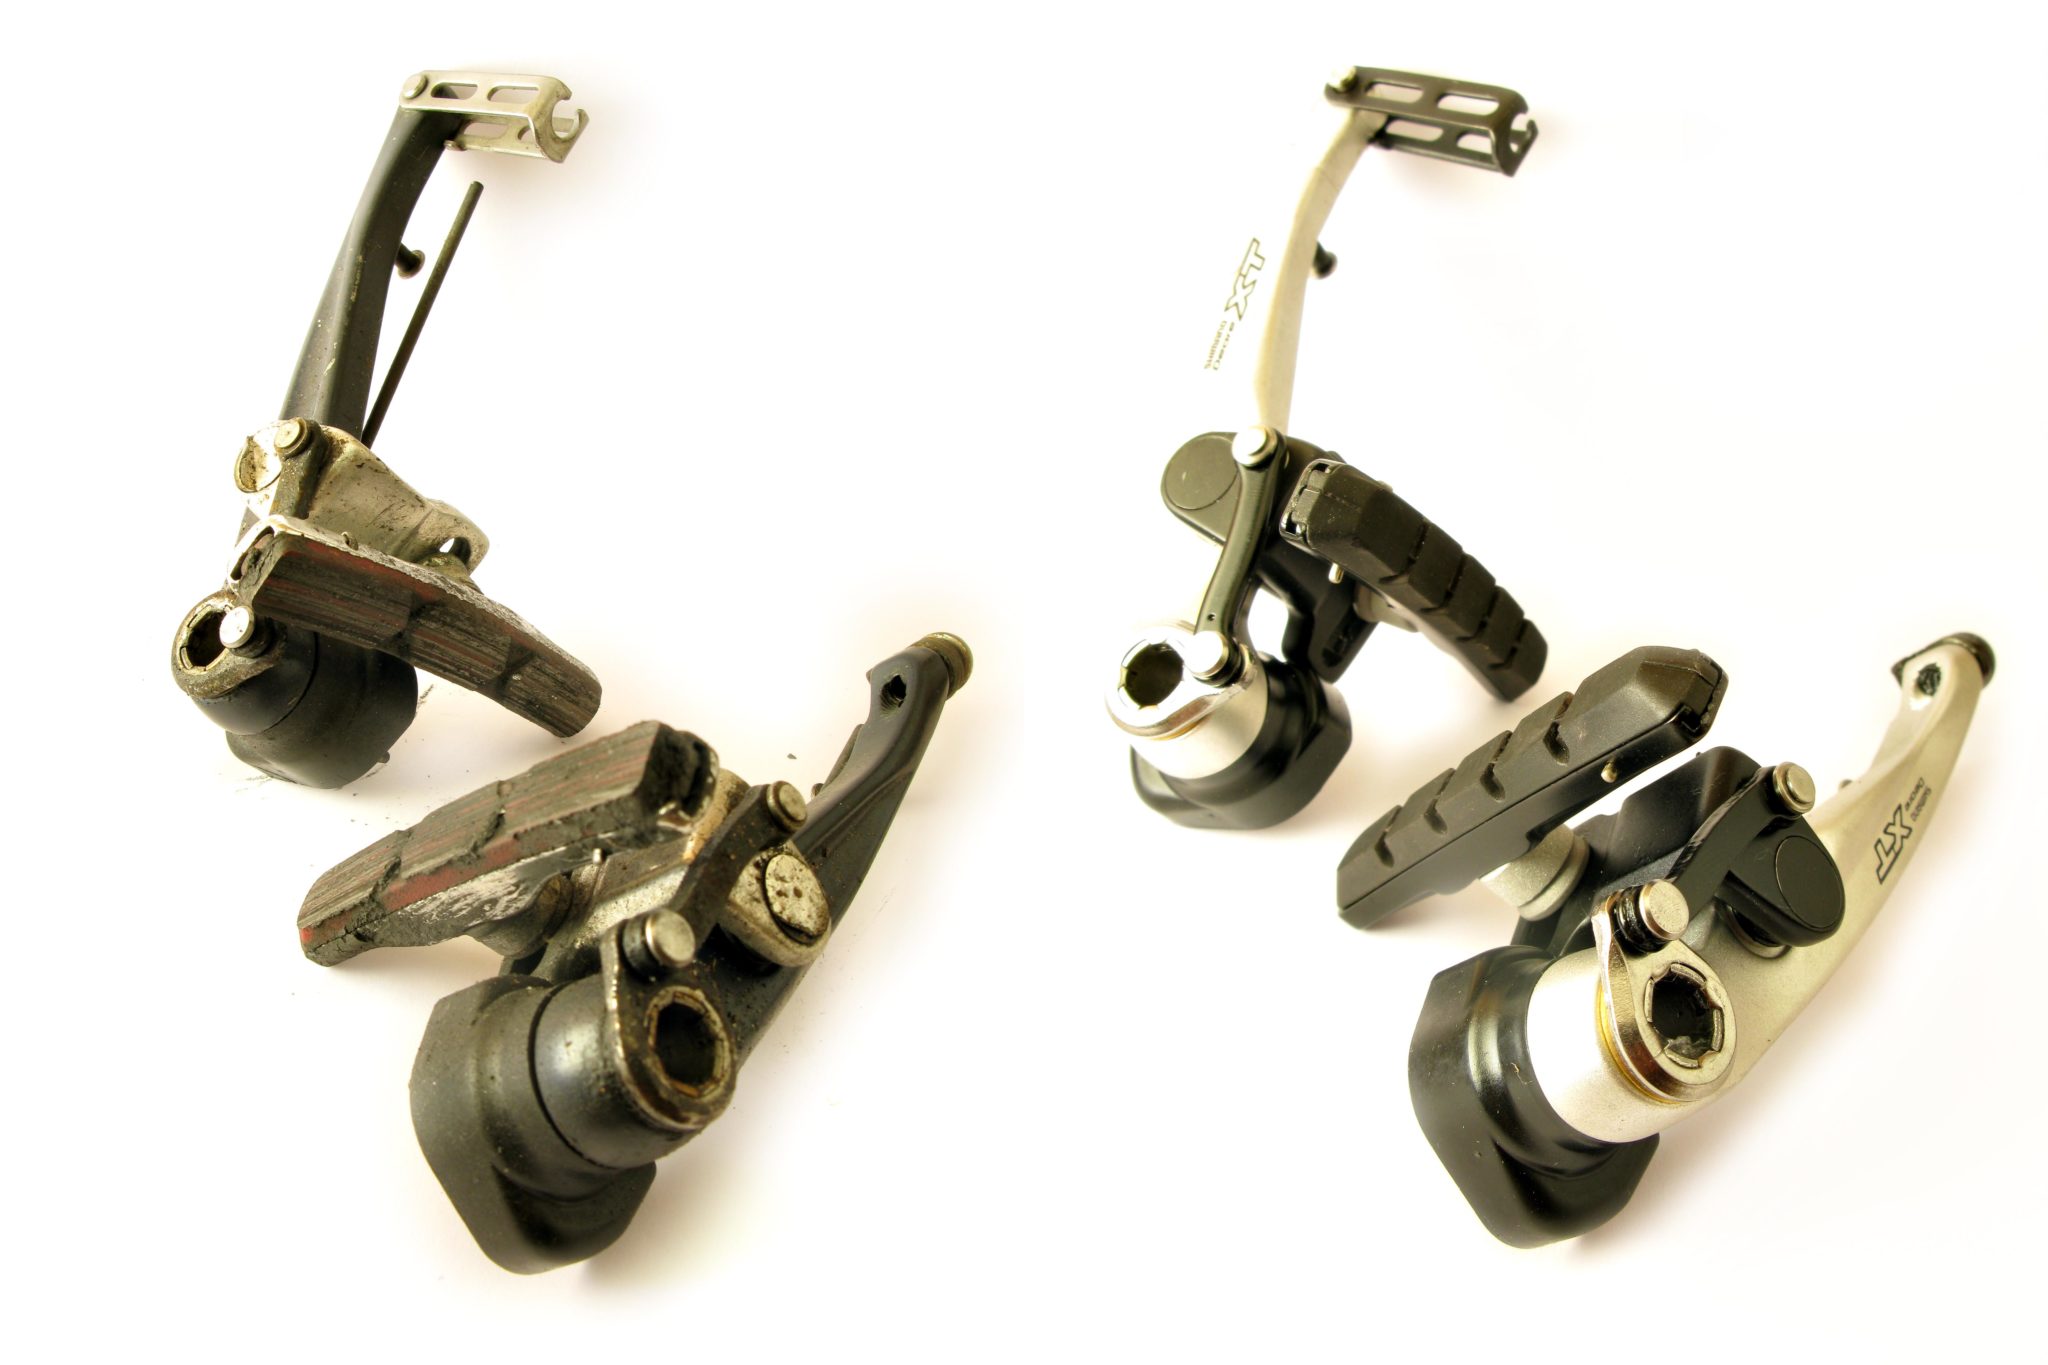
V-brake - service
At this point, we can move on to our brake shoes and pads. If the pads are worn out or simply past their prime, we can proceed to disassembly. We'll loosen the brake shoes, which will make it easier to access the pads.  If you're already at this stage, I recommend disassembling the entire caliper to check the condition of the brakes. To do this, unscrew the bolts securing the arms (usually a 5mm Allen key). After disassembly, you'll see the pivot; it often collects a lot of dirt, so take this opportunity to vacuum it.
You may be interested in - How to replace a bicycle brake cable?
We also recommend lubricating this area to avoid future problems with seized brake shoes. With the brake arms in hand, remove the old pads. When it comes to brake pads, there are two basic types:
- Pads with replaceable lining
- Standard pads
We recommend buying the former; they're a bit more expensive, but subsequent pad replacements will be much quicker. When purchasing pads, pay attention to the weather conditions they're expected to be used in. With older brakes, after a while, the spring no longer returns as it should. Unfortunately, there's no cure for this; the component then needs replacing. The same applies to worn adjusting screws or cracks. New sets aren't expensive, so there's nothing to worry about. Once everything's lubricated and cleaned, we begin installing the V-brakes to the pivots. Next, we mount the new brake pads, paying attention to the shim order. Typically, the thicker set is mounted on the rim side, and the thinner set on the nut side. However, sometimes, with wide rims or very thick pads, the reverse setup works better.  Press the brake arm against the wheel and adjust the brake pad so that it contacts the entire rim surface, at a safe distance from the tire. Tighten the bolt and check that the assembly moves correctly. This must be done very carefully, as improperly installing the brake pad can even damage the tire. Repeat the same process with the other arm of the V-brake. Even an experienced mechanic often makes several adjustments at this stage, so don't be discouraged.
Adjustment - how to replace V-brakes yourself
Now we need to adjust our brakes. First, tighten the barrel on the brake lever and, by pulling the cable, adjust the distance between the brake pad and the rim. The recommended distance is approximately 1 mm, but this can only be achieved with a properly centered wheel . Tighten the cable retaining bolt and check that everything is in order.  If we left too little room and the wheel doesn't turn, we need to repeat the process again. Then, using the adjustment screws, we fine-tune the arm angle. Once everything is ready, let's test the operation of our brakes. The lever should engage approximately halfway through its operating range. The entire adjustment process is described in more detail in the article on replacing the cable .
Done! Now you know how to replace your V-brakes yourself.
Thanks to this "operation," we'll definitely feel the difference in the performance of our brakes. As you can see, replacing V-brakes yourself isn't complicated! It's worth taking care of them, as they're a fundamental safety feature on a bicycle, and the satisfaction of doing the service yourself is irreplaceable.


Uzupełniliśmy artykuł pod kątem podkładek i dodaliśmy odnośnik do strony o wymianie linki, gdzie dokładniej opisana jest regulacja:
https://old.antymateria.com/wymiana-linki/
Pozdrawiamy i dziękujemy za czujność!
Następnie za pomocą śrub regulacyjnych precyzyjnie dostrajamy wychylenie ramion."
Warto byłoby to wyjaśnić. Brakuje też informacji na temat ustawienia podkładek w zależności od wysokości obręczy/zużycia klocków.
Leave a comment