How we create custom bikes at Antymateria
From the very beginning, we knew what the core of our business should be: producing lightweight, simple, custom-made bicycles. The idea of each bike being different and tailored to the customer simply captivated us. Everyone likes to own something unique, and when it comes to bicycles, it's not just about aesthetics. Matching all the components to the customer's needs and taste from the start is ideal. This allows us to avoid compromises on comfort and reduce the cost of modifying the bike after purchase. Furthermore, custom bikes allow for every level of personalization and the realization of even the wildest ideas. And last but not least, building bikes on frames you design is immensely satisfying. In recent years, we've expanded our offerings with new models, including a bar end bike and
a gravel bike, but our work methods haven't changed. So what exactly does custom-made bike building involve?
Custom bike - how do you imagine it?
It all starts with a conversation. Some clients come with a complete vision, others only have a vague outline.
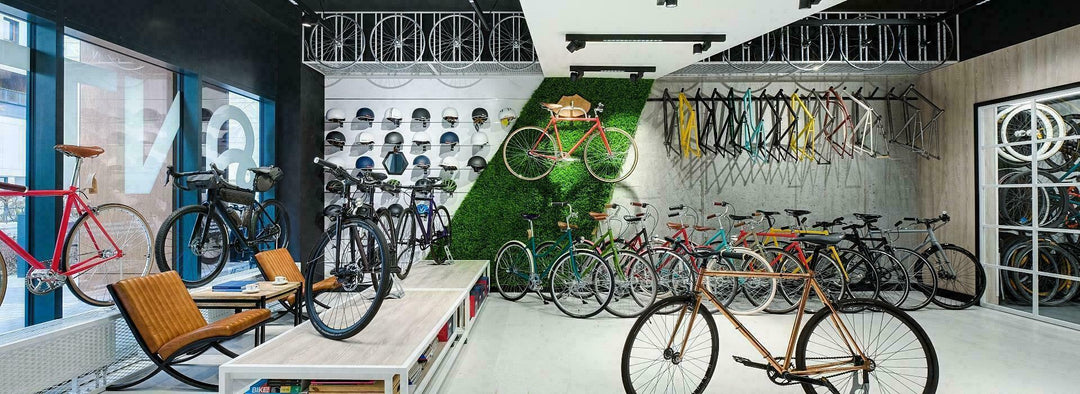
Many are inspired by the bikes in our gallery . Defining their needs is paramount. Sometimes it turns out that a client focused on
a singlespeed ultimately opts for
a women's bike , while someone else opts for a gravel bike instead of a cyclocross bike. A key element of this is
choosing the right frame size and trying on various test bikes. This ensures that the dream bike will be as comfortable as possible. Then we consider the optimal components – the highest groupsets aren't always the best, and we don't want to drain customers' pockets for a derailleur logo. Saddle, tires, and all the parts – the entire component list must be meticulously completed. And finally, the color. There's the entire RAL palette to choose from, along with a multitude of custom options and finishes, making the decision challenging. But more on that in the next section. This stage concludes with a detailed quote.
Paint shop - custom bikes need to be painted in a unique way
Once we have the bike's specifications determined, we begin by sending the frame (and sometimes other parts) to the paint shop. We powder-coat all our bikes. This creates a durable finish, ready to survive the rigors of the city. The frames are first sandblasted, then powder-coated, and finally, they go to an oven where the paint hardens.

Powder-coated frames enter the oven
In the case of multi-layer paint jobs, the process is repeated several times and requires considerable experience to avoid damaging the underlying layers. And our painter is a true artist! Thanks to his skill and creativity, you can choose from
hundreds of colors and finishes. Gloss, matte, or satin? That's just the beginning. Multi-layer metallic paints with wonderful depth, chameleons, glitters, multiple colors, or patterns. Traditional powder coatings don't even attempt such things; for us, it's no problem!

Chameleon with glitter? No problem!
Braiding the wheels
While the frames are in the paint shop, we prepare the wheels. We typically lace them by hand in our workshop, occasionally using system wheels. This ensures the wheel will be durable and stiff, and allows us to easily match the color of the hubs, rims, and spokes. We always use a strain gauge and other professional tools to achieve high repeatability and the best results. To streamline the work, we stock the most popular kits (for example, silver wheels for singles). You can learn more about hand-lacing wheels in this two-part post, divided into
theoretical and
practical sections.

Andrzej knows what he is doing.
We are submitting
Once the frame has returned from the paint shop and the wheels are ready, it's time to prepare the work area and all the parts. The workshop's limited space means that many components must be stored in a separate warehouse, so logistics are crucial.

The burnt frames are waiting to be transported to the workshop.
A good foundation
We start by placing the seatpost, inserting the headset using a press, and bolting on the fork. Next comes the stem and handlebar. This setup allows for easy assembly of the next components. If the bike is equipped with fenders, now is the perfect time to install them. Our custom bikes are 100% handmade!
Drive and brakes
It's time for the bottom bracket, crankset, and pedals. Then the derailleurs and shifters fall into place. The same goes for the levers and brakes. These components are pre-assembled, as their final positioning will occur after the wheels are mounted and during adjustment. At this stage, you can confidently mount the wheels. This allows you to select the appropriate chain length and adjust the position of the brake pads or calipers.

The workshop is small, so staying out of others' way is key.
Wiring
It's time
to route the cables and housing. This is a separate art, as the housings should be as short as possible while still allowing for smooth cable movement regardless of the handlebar position. We also need to consider possible future setup changes, such as a different lever position or a longer stem, so it's always best to leave some wiggle room. Some of our frames feature internal cable routing, which can sometimes add some fun to this stage. Fortunately, compared to most frames, changing the cables isn't very complicated.

Properly selected casing lengths look aesthetically pleasing and allow for smooth line operation.
Regulation
The bike is almost assembled, and we're moving on to adjusting the headset, brakes, and derailleurs. This is an important step, as it allows us to identify any errors. By properly adjusting the cable tension and operating ranges of the mechanisms, an experienced mechanic prepares the bike for riding. We also always apply a little force to ensure the cables and housings settle into their proper positions, ensuring the bike doesn't become out of adjustment after a few kilometers.
Do you want to order a bike?
Details and accessories
It's pure pleasure. After setting up the wheels, we install the grips and saddle, adjust the levers and controls, and finally check the headset for play.
Lights , bells, and other accessories complete the look, and finally, it's time for stickers and badges. The bike is ready!

Our painter works wonders - imitation chrome is our classic!
What's next?
All our custom bikes are tested before being delivered to the customer. Only after riding and checking everything under load can we be sure that everything is as it should be and then call the owner. When we deliver the bike, we set it up exactly for the user, sometimes even adding a few accessories and extras (lights, locks, etc.). We also share our knowledge on how to use it and offer advice
on how to keep the new bike in top condition and take care of it . If all goes well, the smiling customer quickly rides off to their chosen destination.
Zero inspection
The bike is 100% ready about a month later. After this time, we invite you for a quick inspection. Cables and housings typically stretch and settle into place, so minor adjustments are necessary. We inspect the entire bike, and most importantly, adjust the spoke tension. This is essential to enjoying strong wheels for years to come. And that's it! Our custom bikes are covered by a two-year warranty, and we vouch for their quality. We know them down to the last nut and bolt!

For us, nothing is impossible!


Leave a comment